More powerful message brokers are capable of sorting messages based on their properties. Different messages may need to be delivered to entirely different devices on a network. RabbitMQ allows for the sorting of different types of messages based on their properties, ensuring they go straight to the correct delivery point.

There are many ways in which RabbitMQ can be instructed to distribute messages. For example, in a “fanout” exchange every message received can be sent to every known consumer. It is capable of sorting messages based on their content.
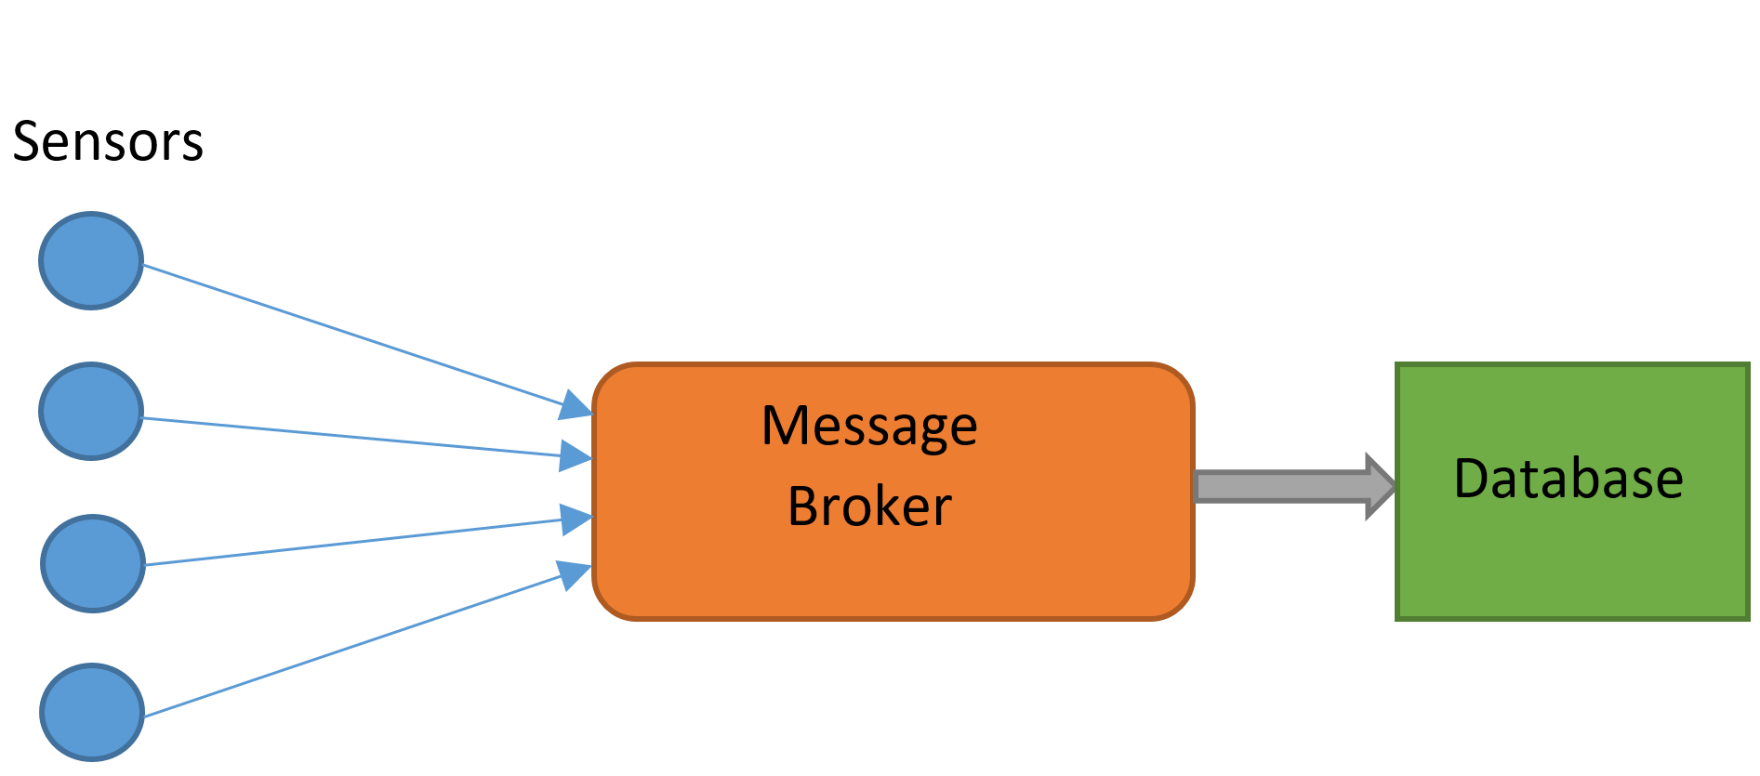
In our deployment, RabbitMQ was to be used to take messages from The Things Network gatweays and store them. MQTT (Message Queue Telemetry Transport) is a protocol designed for machine-to-machine (Internet of Things) applications, and was the protocol used with RabbitMQ. It may be necessary to enable the MQTT plugin:
RABBITMQ-PLUGINS ENABLE RABBITMQ_MQTT
RabbitMQ can be interacted with using a multitude of different programming languages; we used Python. Messages from the gateways were correctly received by RabbitMQ, however it was not possible to process them further. The complexity of RabbitMQ made it difficult to perform any processes more complex than sending and receiving messages from the localhost. After many hours of tweaking, it was still not possible to obtain data via RabbitMQ, and an alternative solution was necessary.
Mosquitto is an alternative message broker, developed exclusively for use with MQTT. It is a much simpler, lightweight alternative to RabbitMQ. Due to its reduced feature set, performing complex routing arrangements is less practical. RabbitMQ also features a slick, built in user interface, viewable through a web browser, a luxury not available on the Mosquitto broker. This makes it less easy understand the status of the message broker and the data. This simplicity was an advantage however; shortly after installing and switching to Mosquitto, data was correctly received. Furthermore, it is often possible to process and sort the messages in Python (or another language), negating an advantage of RabbitMQ
When choosing a message broker, it is important to evaluate whether the extra features of RabbitMQ are really necessary, and justify the extra complexity. In our use case the goal was simply to transfer data from The Things Network to be stored in MongoDB. It was far quicker and more efficient to use MQTT than RabbitMQ, and there was no loss in functionality in doing so.
Pika (RabbitMQ-Python Interface)/
Paho MQTT (Python MQTT client)
import paho.mqtt.client as mqtt  # library for communicating with mqtt
from pymongo import MongoClient  # mongoDB library
import json  # for (de)serialising javascript objects


def TTN_add():
    try:
        print("TTN_Add running")
        mqclient = mqtt.Client()
        mqclient.on_connect = on_connect  # on connection runs "on_connect function"
        mqclient.on_message = on_message  # on message...
        mqclient.connect("localhost", 1883, 60)  # 60 indicates keep-alive time
        mqclient.loop_forever()  # keeps it going forever
    except KeyboardInterrupt:
        mqclient.loop_stop()
        print("stopped")


def mongo_insert(Gateway_ID, payload):  # function to add stuff to the database
    collection = db.test_collection  # this creates the collection
    print ("Gateway_ID " + Gateway_ID)
    payload = json.loads(payload)  # payload to json version
    collection.insert_one(payload)
    return


def on_connect(mqclient, userdata, flags, rc):
    print("Connected with result code "+str(rc))
    mqclient.subscribe("gateway/#")  # only gateway topics


def on_message(mqclient, userdata, msg):
    print("on_message")
    print (msg.topic, msg.payload)
    # print (type(msg.payload))
    mongo_insert(msg.topic, msg.payload)


moclient = MongoClient('localhost', 27017)
db = moclient.ttn_database
TTN_add() #starts event handlers
]]>
The K30 is a low-cost, low-maintenance CO2 sensor capable of interfacing with a Raspberry Pi. It is designed to accurately measure ambient CO2 levels over long periods of time. The K30 detects CO2 using an infrared source, and an infrared detector. Since different molecules absorb different wavelengths of infrared light, the amount of absorption at certain wavelengths indicates the levels of those molecules. This leads to measurement issues when other molecules absorb light at similar wavelengths. In situations of low concentrations, SO2 and NO2 can cause cross sensitivity with CO2.
Used in conjunction with a Raspberry Pi, the K30 is perfect for remote monitoring of CO2 levels. The Raspberry Pi has many unique qualities that make it perfect for interfacing with the K30 and other sensors. Its respectable compute power, versatile General Purpose Input Output (GPIO) pins, and full network capabilities allow it work with almost any sensor. Combined with its low cost and compact size, it is an excellent choice for most applications. The Raspberry Pi 3 has Wi-Fi and Bluetooth built in which makes sending the data to other devices relatively easy. In our deployment of the K30, remote data communication will achieved using LoRaWAN, a long range, low power network. This will be used to send data to a gateway connected to the internet.
Some setup is required to best utilise the Raspberry Pi to communicate with the K30 Sensor. The K30 communicates over serial, which required the Raspberry Pi to have UART (Universal Asynchronous Receiver Transmitter) enabled. This can be done by editing the boot configuration:
$ sudo nano /boot/config.txt
And appending the file with:
enable_uart=1
By default, the console uses the serial output to output data, which can be used as a way to control the computer headlessly. This should be disabled to allow the serial output to be used by the K30 for data transmission. This can be done by deleting the console serial port allocation in the boot file:
$ sudo nano /boot/config.txt
The allocation will look something like:
“console=ttyAMA0,115200”
Alternatively, this can be disabled through the interface options in the raspberry configuration menu:
sudo raspi-config
Once the Pi is prepared to receive serial data, the K30 must be connected. This is a relatively simple case of connecting the K30 to 5v (a separate power supply was used), connecting the Pi and K30 to ground, and then cross-connecting the serial connections. A simple LED circuit was also established from the Pi’s GPIOs.
To test the K30 sensor, a prototype as developed, using a Raspberry Pi, the sensor, and some LEDs. CO2 readings were read from the K30 using the serial library in Python, which then controlled LEDS via the GPIOs. To visually demonstrate the functionality of the K30, a red LED was turned on when values over 1000 ppm of CO2 were detected. Values within the room were typically around 600 ppm, which could easily be raised over the 1000 ppm threshold by exhaling on the sensor. The ambient readings are in line with the expected CO2 levels for an office, and the sensor clearly respond to an increase in CO2 levels.
The full Python code used is below. Note that the serial port is TTYSO which is standard for the Raspberry Pi model 3. In earlier versions of the Raspberry Pi this may be different.
More information on the K30: https://www.co2meter.com/products/k-30-co2-sensor-module
Full Python code:
#rpi serial connections
#Python app to run a K-30 Sensor
import serial
import time
import RPi.GPIO as GPIO
GPIO.setmode(GPIO.BOARD)
GPIO.setup(12, GPIO.OUT)
GPIO.setup(16, GPIO.OUT)
ser = serial.Serial("/dev/ttyS0", baudrate=9600, timeout = 1) #serial port may vary from pi to pi
print ("AN-137: Raspberry Pi3 to K-30 Via UART\n")
ser.flushInput()
time.sleep(1)
cutoff_ppm = 1000 #readings above this will cause the led to turn red

for i in range(1,101):
    ser.flushInput()
    ser.write("\xFE\x44\x00\x08\x02\x9F\x25")
    time.sleep(.5)
    resp = ser.read(7)
    #print (type(resp)) #used for testing and debugging
    #print (len(resp))
    #print (resp)
    #print ("this is resp" + resp)
    high = ord(resp[3])
    low = ord(resp[4])
    print(high)
    print(low)
    co2 = (high*256) + low
    print ("i = ",i, " CO2 = " +str(co2))
    GPIO.output(12, GPIO.LOW)
    GPIO.output(16, GPIO.LOW)

    if co2 > cutoff_ppm:
        GPIO.output(12, GPIO.HIGH)
    else:
        GPIO.output(16, GPIO.HIGH)
    time.sleep(.1)

]]>